The MGA With An Attitude
Generator INSTALLATION - ET-123A
On Aug 17, 2025, Steve Nisewander in Cottage Grove, Oregon, USA wrote:
 "Is it possible to replace a generator the a 1962 MGA Mark II without removing the radiator? I can't seem to reach the bolt on the bottom of the generator. I can't see it from below either. I just need to know the easiest way to get this part off so i can put my new one on".
Yes, it is possible. You will skin your knuckles and drop the tools several times, and likely swear a lot. But you have to learn how to do it, because you have to wrench on those lower bolts just to adjust the fan belt tension. Similar for generator or alternator. Removal is the reverse of installation, but easier for me to describe installation first.
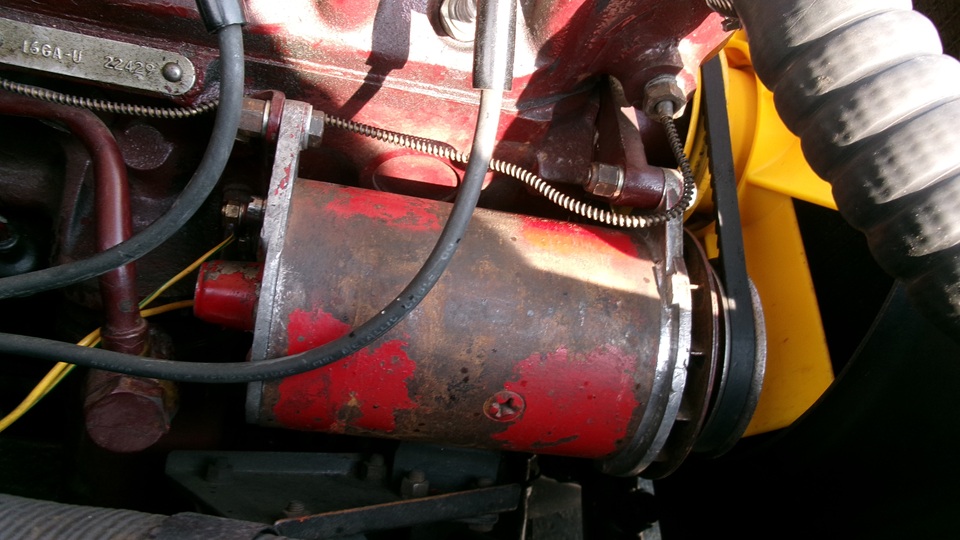
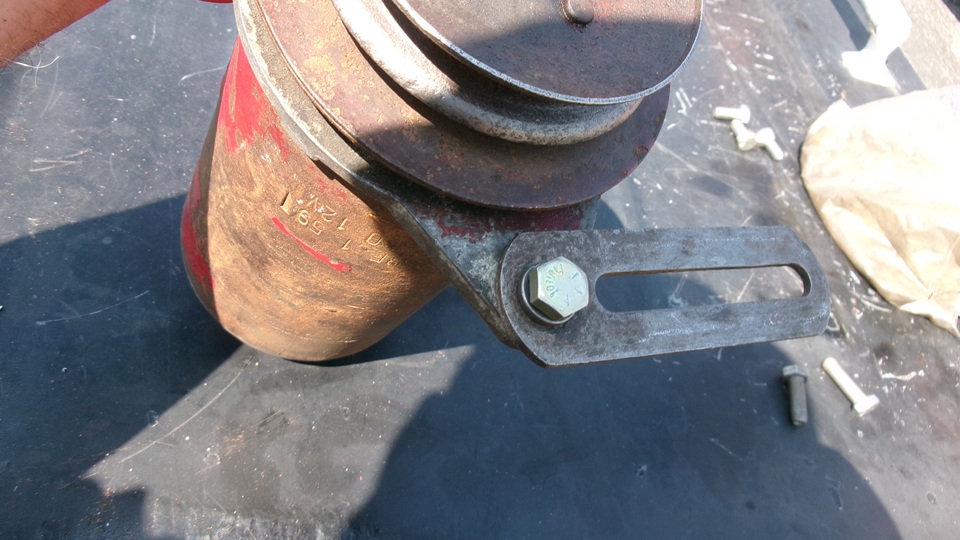
Bolt the link to the generator first,loosely, with the small bolt and lockwasher. That bolt is originally 5/16-22-BSF thread (with metric wrench size) and may sometimes strip the thread out of the aluminum front plate (especially if someone had cross threaded an incorrect fastener). I like to drill out the threads and install a 5/16-24-UNF stainless steel Heli-Coil to use a new5/16-24-UNF fine thread bolt with 1/2" hex head and never worry about stripping it again.


Then position the generator roughly in place,with the link slipped onto the pedestal stud, and install the large flat washer and lockwasher and self-locking nut loosely. But a self-locking nut (prevailing torque lock nut) is a PITA, because you can't spin it up with your fingers, having to wrench it, and wrench it, and wrench it,and wrench it, all the while in the confined space. So you may find it easier to use a lockwasher and standard flat nut. Spin those fasteners up to take out the slack. Then position the generator and install the top two bolts loosely (longer bolt at front) with bolt heads in front, lock-washers and hex nuts in back, and spin those up to take out he slack. From this point on it is good to have an extra pair of hands (helper).
Push the generator inboard, and install the fan belt loosely over the three pulleys. Place a flat pry bar between the cylinder head and generator, and push the generator outboard to tension the fan belt, and be prepared to hold it in that position for a while (like helper on far side of car to pull on the bar with one hand). Be careful not to break the temperature sensor's small tube with the spiral wound wire wrap (photo at top of page). That is difficult and/or expensive to repair.
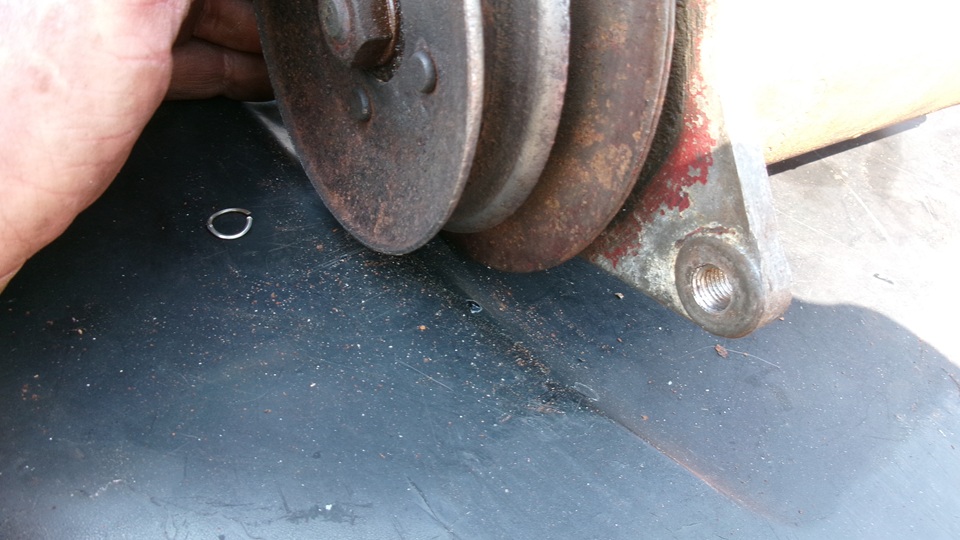
Use pry bar to tension the belt while you reach a 9/16" wrench underneath to tighten the adjuster nut. This is where you do things backhanded with skinned knuckles, maybe need a small pencil beam flashlight, go one flat at a time, and drop the wrench a few times in the process. Sometimes a ratchet and socket may work, but maybe not if the fan belt is in the way. An aftermarket fan shroud can also get in the way at this point. With some practice, you may eventually figure out that it may be easier to NOT drop the wrench (and/or fasteners) than it is to retrieve the things you drop.
Once the larger adjuster nut is tight with correct belt tension, you can relax and remove the pry bar. Then snug up the other fasteners. Even then the smaller link bolt directly below the pulley is a tough reach with a wrench, and you may drop that tool a few times as well.
The two top bolts are clearly easier. You may need to loosen the two bolts holding the rear bracket on side of the engine block to allow the rear bracket to self-align while you snug up the top bolts. then tighten the rear bracket bolts, and go once more around to final check and tighten all of the bolts.
When you understand how the installation works, then removal is much easier. Loosen all of the fasteners, in any sequence you like. Push generator inboard to remove the fan belt. Then it's mechanic's choice if you would remove the larger adjuster nut and washers first, or remove top bolts and pull the generator outboard for easier access to the adjuster nut. You can leave the link attached to the generator while you lift it out.
|